Surrounding plasticine sun model. Crafts for the little ones. “Sun” from plasticine
Parents should engage with their children. Do you agree with this? Need your own free time try to spend it with your child.
What could be better than making crafts together?
This is a fun activity that helps develop imagination. As for plasticine crafts, a child who sculpts develops not only his imagination, but also his fine motor skills.
Scientists have proven that small finger movements affect the development of a child’s thinking, promote concentration, imagination, vision, memory and speech. This is why it is so important to start modeling plasticine with babies from the age of 8 months.
Today in my master class I will talk about how to make a sun from plasticine. Even the smallest craftsmen can make such a figure. These are the simple crafts you should start with with your kids.
Crafts for the little ones. “Sun” from plasticine
Crafts for the little ones: “Sun” from plasticine
Now there are many companies producing plasticine for children. One of the companies is Jovi, which produces plasticine for children from 1 to 3 years old.
It is important that Jovi plasticine for children is made from natural products. The base of this plasticine is made from starch and flour (wheat or rice), and is colored only with natural dyes. It is soft, gentle and safe for the baby.
To create it you will need plasticine in the following colors:
- Yellow;
- White;
- Black;
- Red.
Let's start the plasticine modeling lesson
![]()
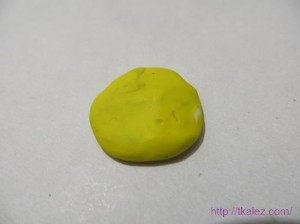
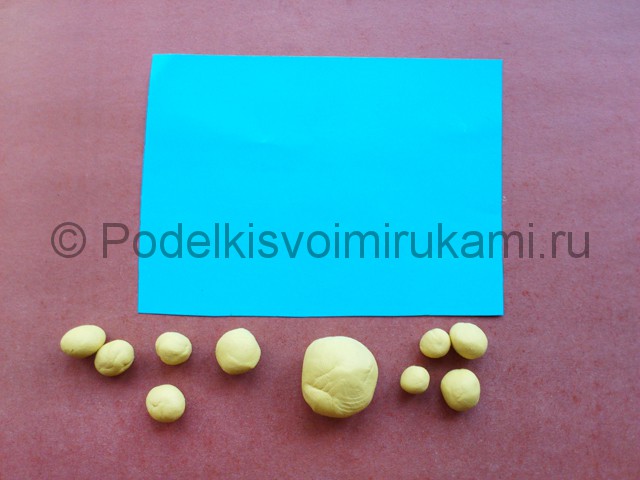
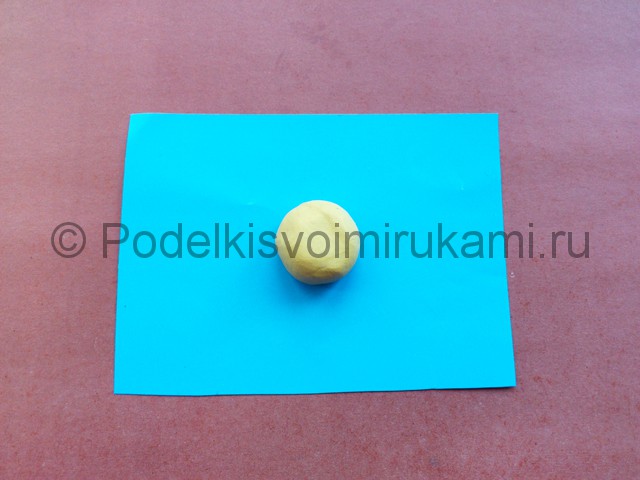
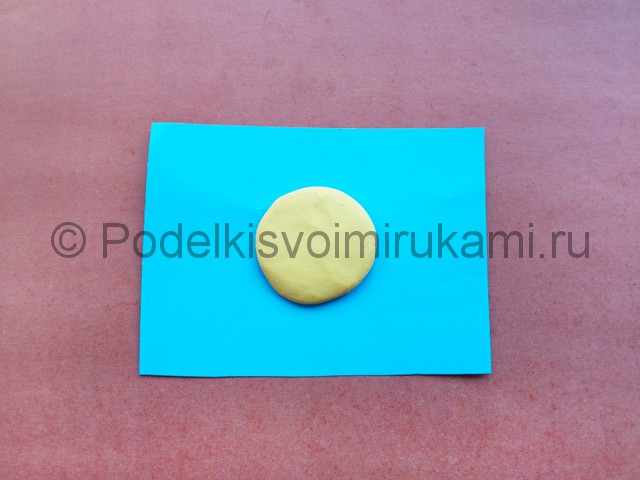
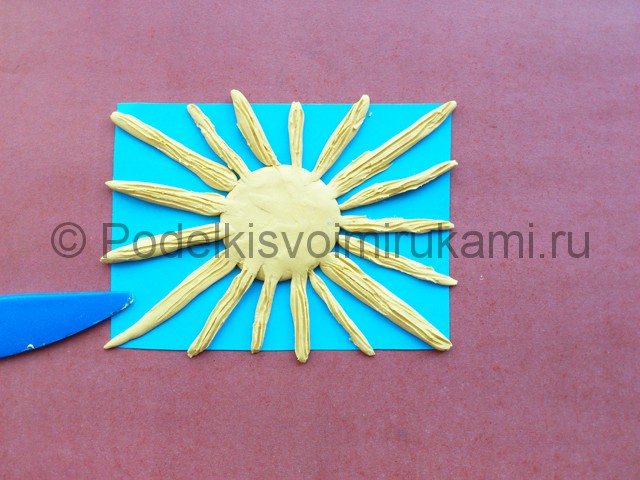
1. Take a piece of yellow plasticine. You need to roll it into a ball. Now press it down with your palm. It turns out to be a flat cake.
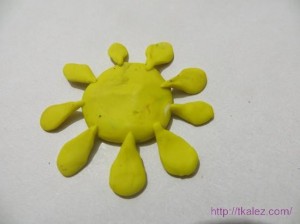
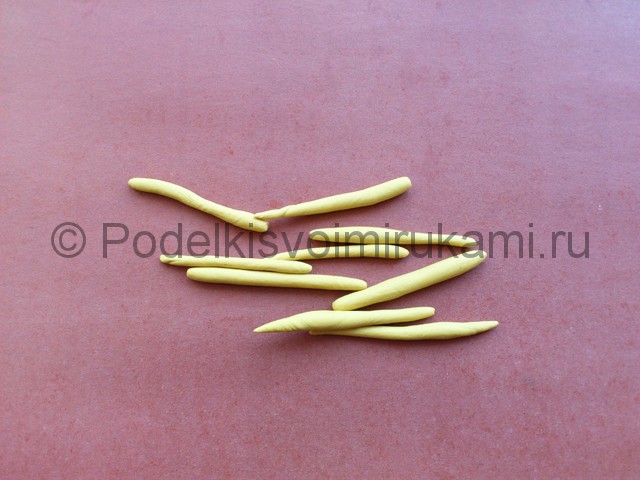
2. Help your child roll a few small balls. I got nine of them. Flatten them with your fingers and slightly stretch the edge. These are rays. We attach them to the sun.
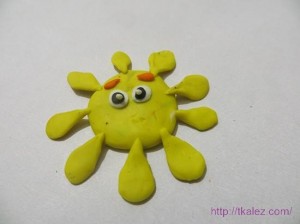
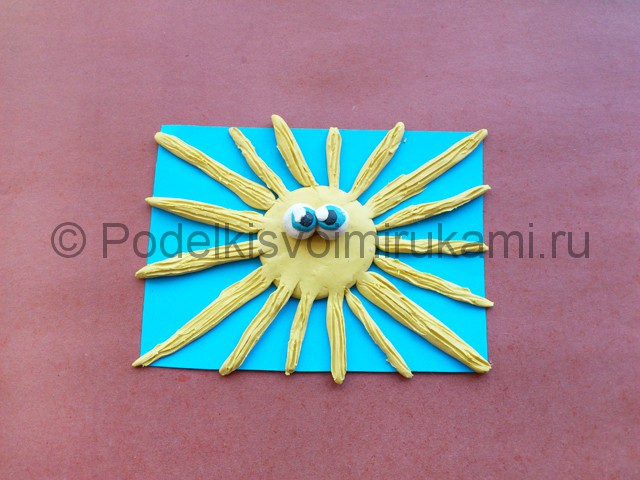
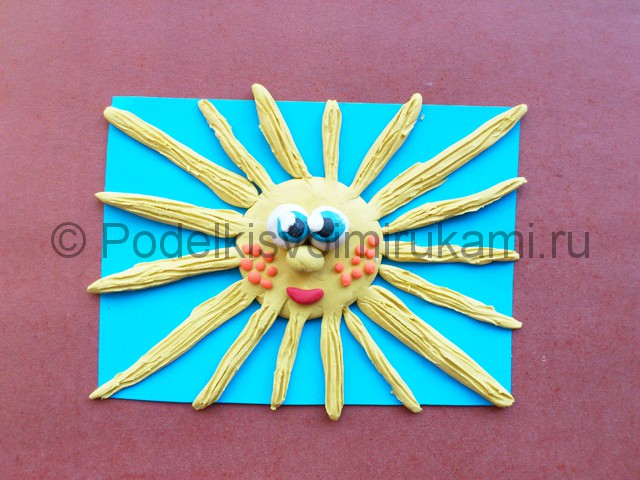
3. Now we take white and black plasticine. We make eyes out of it. First the white part in the shape of a cake, then the pupil, and then the highlight. I made oval-shaped eyebrows from orange plasticine.
Modeling is a very interesting and useful activity for children. Modeling is a kind of gymnastics for a child’s hands and fingers. In the process, they learn to experiment, because any movement of the hands, the action of the fingers can give a new shape to the soft material and lead to the creation of new images. In addition, if something doesn’t work out, the part can be easily crumpled and remade again, which means making a mistake and coming up with something new is not at all scary.
But before you start inventing it yourself, the child needs to learn how to sculpt something specific. Here are some sculpting lessons for kids.
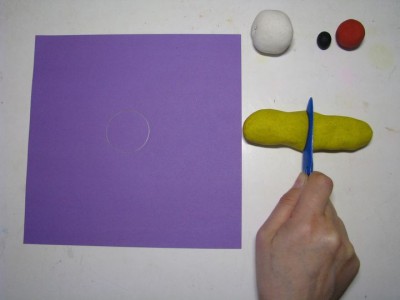
First of all, let's prepare the workplace.
Roll the yellow dough into a sausage and divide it into two parts.
Roll out one part into another thin sausage and divide it into eight equal parts.
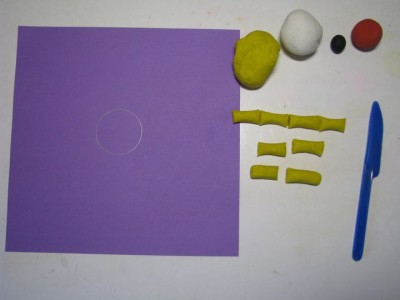
Now - a little trick. Find any glass on the farm whose base diameter is smaller than the neck and trace the bottom with a pencil on colored paper. Now we turn each of the eight pieces into a micro-sausage and slightly flatten it. Now, focusing on the drawn circle, it will be easier for the child to evenly lay out the resulting rays of the future sun.
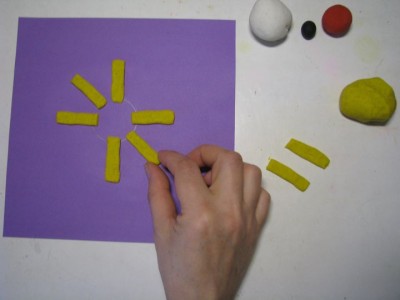
Take the second piece of dough and roll it into a flat cake 4-5 mm thick. Use the neck of the cup to squeeze out a round disk and place it on top of the rays. Don't forget to moisten the joints with water.
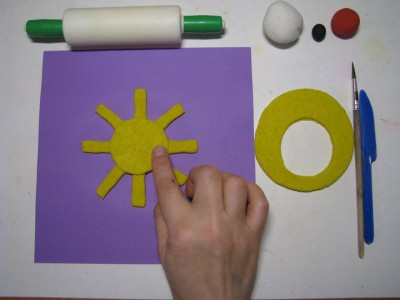
Let's straighten the rays with a stack. Next, roll two small balls from the white dough, flatten them and place them on the disk. To make this “design” more like eyes, add a small ball to the center of each eye. The balls can be lightly pressed with the tip of the rod. This is how we get the pupils. Well, for greater beauty, let’s draw a stack of eyelashes.
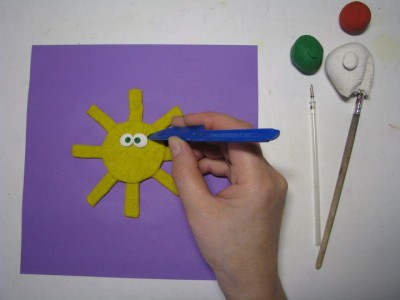
Let's create a smile from two small cakes and a thin flagellum. Use the same ballpoint to add freckles. The cheerful sunshine is ready!
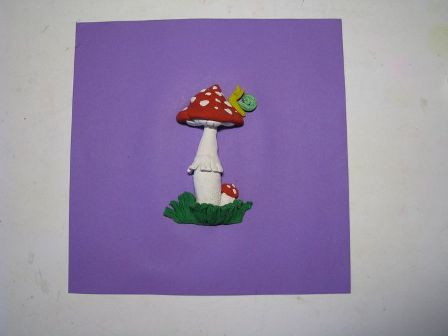
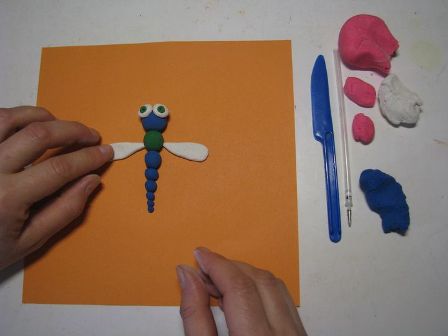
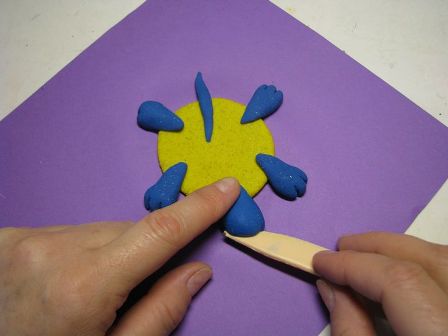
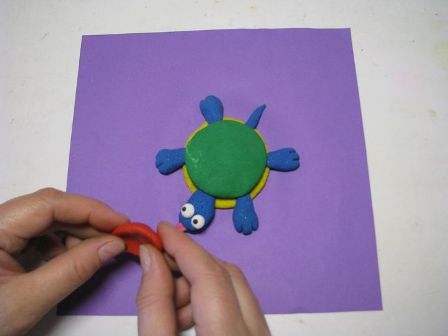
Here are a few more examples of creating simple works.
Dragonfly

Turtle
Today again Katya’s favorite lesson, and again we did a small project on it at home. It’s just that the textbook says: “make models of stars out of plasticine,” and Katya really wanted to do it, although we weren’t asked to do this :) And then we decided to make a box in which to store these stars. Moreover, Katya was recently in the astronomy office, which our dad did the decoration for a couple of years ago - just like that. He himself prepared 3D models of stars and even applied natural textures to them, taking them from the NASA website. (By the way, anyone who wants can you download these posters? by following the link). And Katya wanted such posters to hang in our home too. So we spent the entire evening printing, molding, and gluing. And here are some visual aids for the stars that we got.
Firstly, the stars themselves. Katya was working hard here. It turned out that it was not an easy task to achieve the required proportions. We checked according to the textbook - simply placing the balls on the drawing so that there was an exact match.Secondly, a box for them. Here we came in handy with a translucent plastic herring container ;) I covered the inside of it with dark blue metallic colored paper - it really looked like the depths of space! Such an interesting effect that Katya and I decided to make the same box larger and create a real space there - with galaxies, comets and the like. In the meantime, we designed the box to make it clear that this is a scientific model, and not just plasticine balls in a box))). To do this, we pasted on a title and, most importantly, added a legend - inscriptions about what it means.
That's a completely different matter!
And thirdly, we asked dad to print his posters in the photo studio on glossy thick paper - so that we could take them to class and show them to the children, and then hang them on the wall at home. Unfortunately, the size of each part was only A4. In Vitya’s class, they are each A1 size! But it still turned out very impressive and interesting - I just glued it to the closet myself, and then stood and looked at it :)
So Katya was ready for class today :)
In general, I really like the 1st grade program on "The World Around Us." Comparing with what happened 7 years ago during Vita’s studies, I can note interesting innovations - many independent projects have appeared and even more tasks in which you need to find something, do it yourself, find out, conduct an experiment, find it, print it out. I know that many parents are unhappy with this - they believe that the school shifts the child’s education onto them. But, in my opinion, this is exactly what should be done: for the child to continue at home what he just learned at school. Otherwise, all this information will simply settle as dead weight somewhere in the depths of memory. Moreover, it is not at all necessary to do something grandiose - our teacher personally does not require anything like that. Just take time for it. After all, the topics are necessary and interesting! And the level of presentation is extremely simple and covers only the most essential things. I conducted approximately the same classes and in this language with Katya when she was 4 years old :) In the next classes they will return to these topics again and again - deepen, complement. And now everything is done in order to awaken curiosity in the child. And the authors of the program succeed - " The world"Katya's favorite lesson.
Here you can see other Katinas projects for school (1st and 2nd grade) : Project "Countries of the World": , : Krasnodar, Research project " ", Project " ", Presentation " ", Project " ", Project " ", Collage, Research project " ", Presentation " ", .
And here you can see more posts about space and astronomy for children : Lapbook "
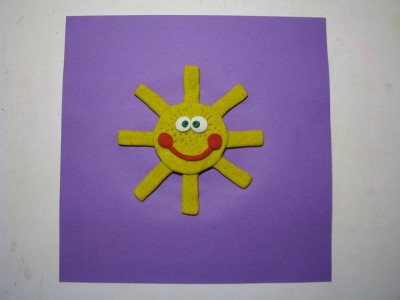
Well, what could be nicer, brighter and warmer than a bright smiling sun. In this modeling lesson we will do just that, and since the sun with rays is a very easy craft, this work is suitable for the youngest sculptors. Children in the nursery group of the kindergarten will master this work under the guidance of adults, only they should choose high-quality soft plasticine. Firstly, there is a chance that the baby will want to taste the bright block, and secondly, it will be difficult for weak fingers to fidget and knead the dense mass.
1. Even a child can choose the appropriate color of plasticine from a box for modeling a sun - a yellow or orange block will do. Also stock up on a stack - a plastic tool that is usually included in plasticine sets.
2. It is best to perform this object in the form of an application, i.e. by spreading it on cardboard. Cut out a piece of blue cardstock. Divide the prepared yellow plates into portions. One large ball will be used to sculpt the little body of the sun. You should also prepare small balls for sculpting rays. The more balls, the more rays, but they do not have to be the same size.
3. Stick the center body part into the middle of the cardboard.
4. Use your fingers to knead the plasticine so that the sun sticks to the paper and becomes flatter.
5. Start rolling each ball prepared for sculpting rays with your fingers, forming a thin sausage.
![]()
6. Roll many thin sausages.
7. Start attaching the rays to the round sun, pressing them onto the paper with your fingers.

8. Place all the rays in a circle and draw additional longitudinal stripes in a stack.
9. Attach blue eyes to the central part of the sun’s body.
10. Add a mouth and bright freckles.
The solar composition is ready. As you can see, there is nothing difficult in such work, and any parent can practice such creativity with their children.

Relief modeling from plasticine “Portrait of the Sun” is made on a cardboard base. The age of children can be very different. It is best if you make this work as free, creative and independent as possible. Before starting work, talk with the children about the sun and how people depicted it. Generally speaking, the sun is a circle and rays. Moreover, such symbolism can be traced among many nations. You can show Russian and, for example, Peruvian solar symbols. Discuss how they are similar. Then invite your child to “draw” a portrait of the sun, but not with paints and pencils, but with plasticine. Before making the molding, you can draw sketches on small pieces of paper.
We offer you not a detailed master class, but a description of the main stages and several ready-made pictures for “inspiration.” Do not forget to prepare for work not only plasticine, a board, a stack and a cardboard base, but also a variety of sticks, caps from pens and felt-tip pens, caps and other interesting things that can be printed on plasticine.
Stages of relief modeling “Portrait of the Sun”.
Roll a ball and stick it in the center of a cardboard square. We'll flatten it. Let's get the base of the sun from plasticine. 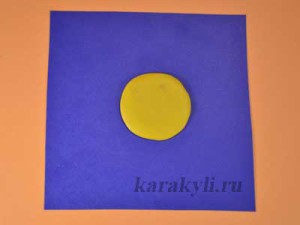 Let's roll up the bundles of rays and glue them onto a cardboard base. You can stick it straight, curled, zig-zag - whatever you like.
 ![]() Since we are making a portrait of the sun, we need to make a face. Remind your children of this.
Since we are making a portrait of the sun, we need to make a face. Remind your children of this.  Now all that remains is to decorate the sun.
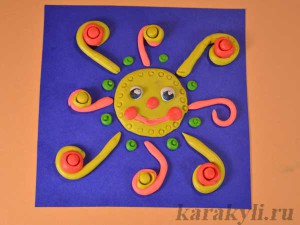 Here you can turn around! Let the kids add small details as they see fit. Show children what interesting effects can be achieved by pressing plasticine with a cap from pens or felt-tip pens or scratching patterns with a toothpick.
 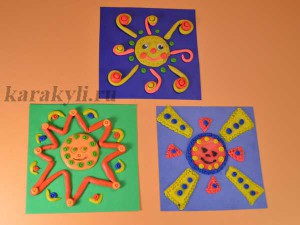 Variants of relief modeling from plasticine “Portrait of the Sun”.