Sculpt a mouse from plasticine. How to make a gray mouse from plasticine. Master class for the little ones. Materials for modeling.
Print Thank you, great lesson +3
If you are afraid of mice, then you need to get rid of this phobia, because these animals are so cute and miniature. We suggest you make a gray mouse out of plasticine and place this wonderful craft in the most visible place to periodically meditate and get rid of your own fears. Making animal figures from soft mass is always interesting; you can captivate your child for a long time with such work, and then brag about your joint achievements to other household members.
You will need to sculpt a mouse
The clay is easy to use right out of the box, but here are a few tips on how to get the most out of it. If at the end of your modeling session you don't want to save specific designs or leftover clay, you can put them in a bowl of water and let them sit overnight. It will become soft again even if the Clay has pre-hardened. The next day you need to wedge the clay well to pull out all the pieces. To make it workable again, you can tear off a small piece and throw it in your palms to get extra water.
Step-by-step photo lesson:
Plasticine colors: a lot of gray; two pieces of black and white.
Naturally, the mouse can be made not only gray, but also white or beige. You can repeat all stages of sculpting with other colors. Or maybe you want to create a whole family of miniature rodents. So, knead the plasticine in your hands and get started.
After about 10 minutes it should be workable again, although if it's still too wet it may take a while to close slightly. Several students made sculptural forms that were hacked throughout the night. We found that The best way To fix them is to use a small amount of wet clay in the cracks, smooth them out and let them dry. This worked in almost all cases. Once dry, the piece can be carefully scraped or sanded to make it smooth. For creating larger shapes, the coil method works very well with this clay.
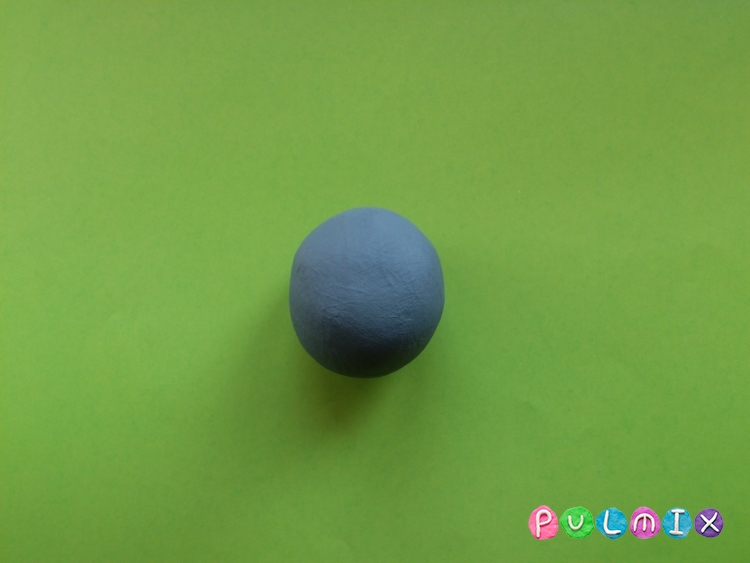
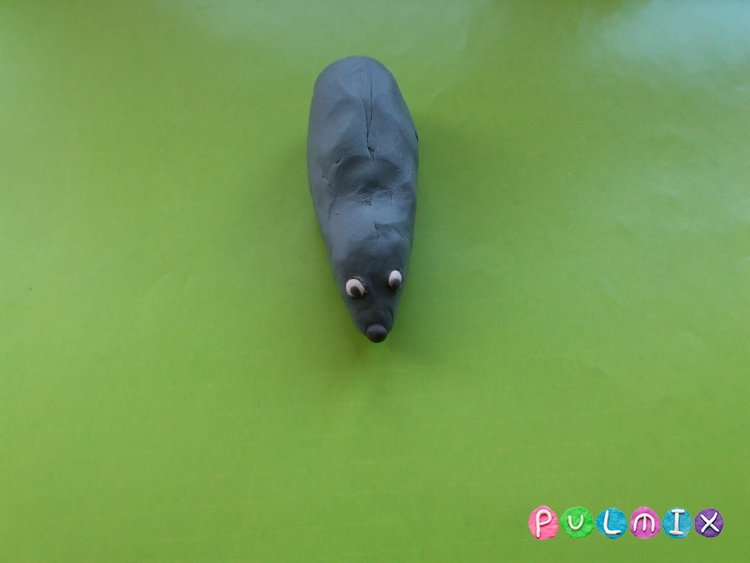
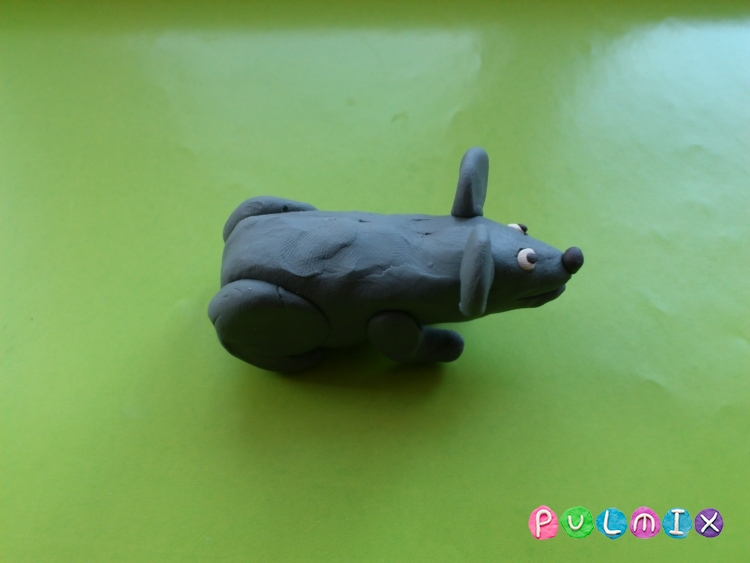
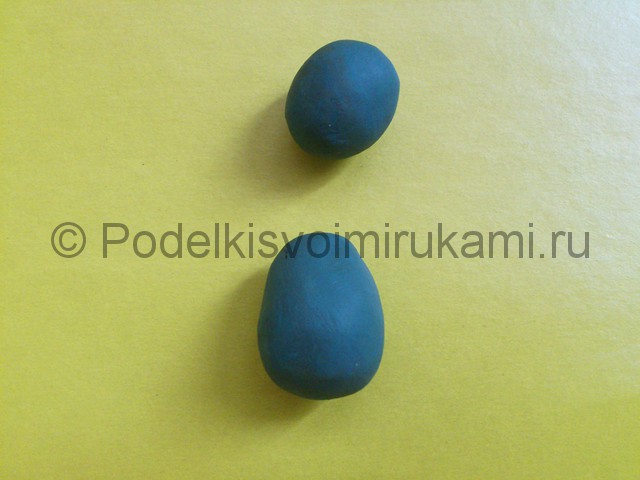
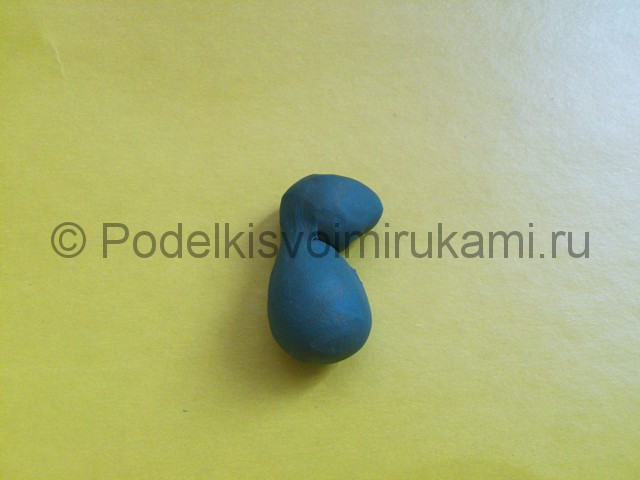
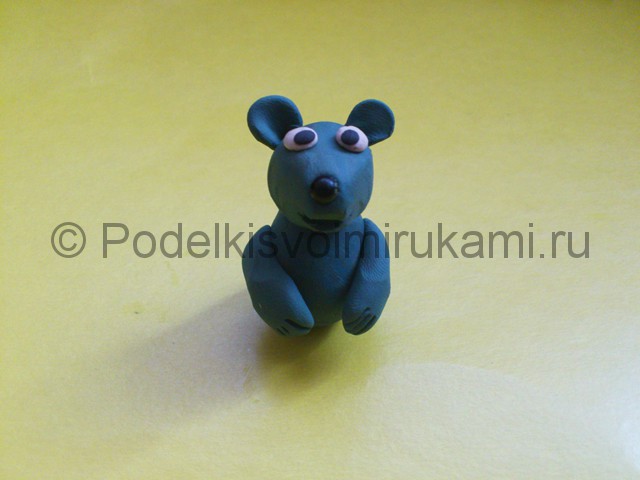
From the prepared ball, make a part that resembles the outline of a mouse; the back, neck and head should be clearly visible.

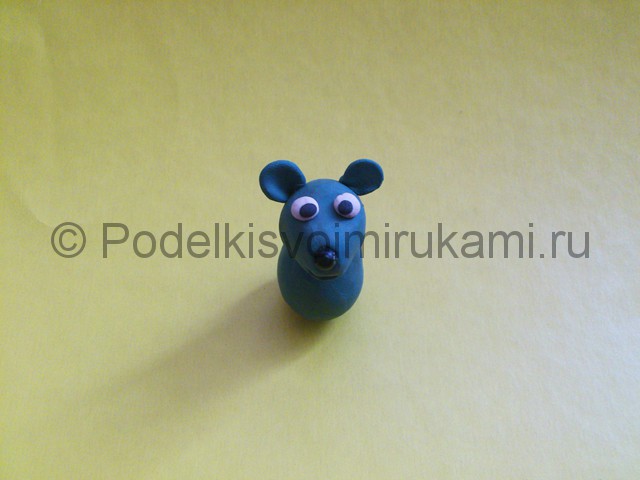
Attach a black bead to the pointed nose. Attach miniature eyes just above the nose.
Just note that it can be tricky adding wet clay to partially dried clay. This clay works best when all parts are the same consistency. Counting the shapes with a sharp tool and using wet clay together also helps. To preserve the work in progress, we wrapped the wet pieces in plastic wrap, then placed them in a plastic bag with a damp paper towel inside. This worked great and the students were able to get back to where they left off.
Once dry, this clay can be painted with acrylic paint. We added an acrylic medium on top of the paint to give the piece a glossy sheen. One caveat: you cannot use this clay on functional objects that have liquids in them. You also can't expect this clay to have the drying strength of clay.
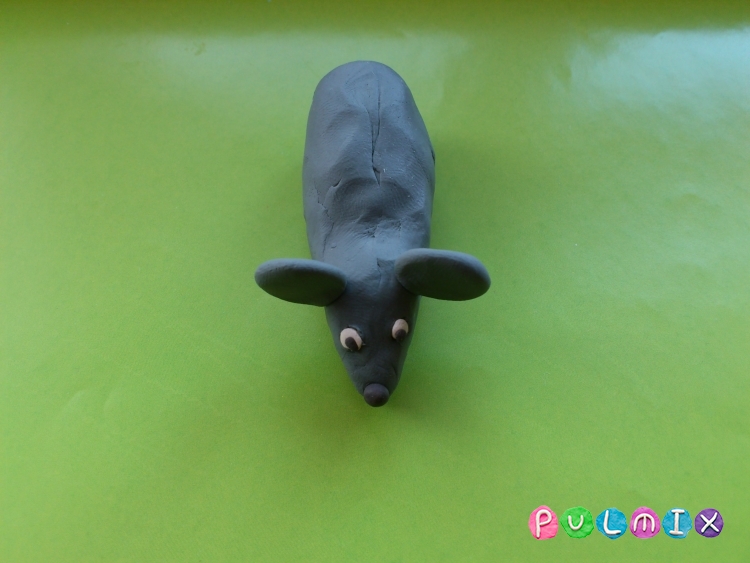
Just above the eyes, attach two gray pancake ears. So the appearance of a rodent is ready.
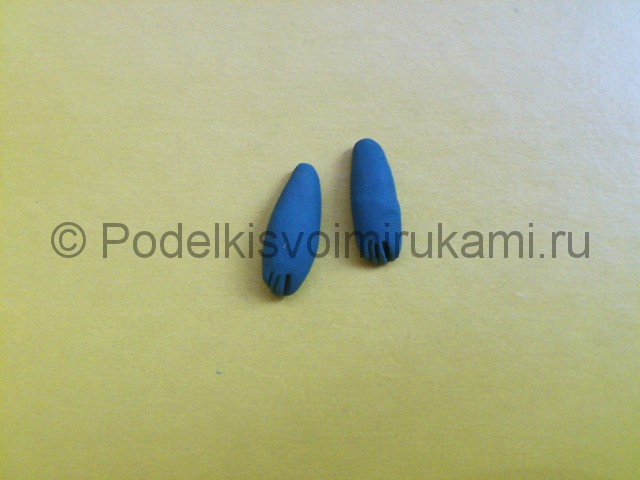
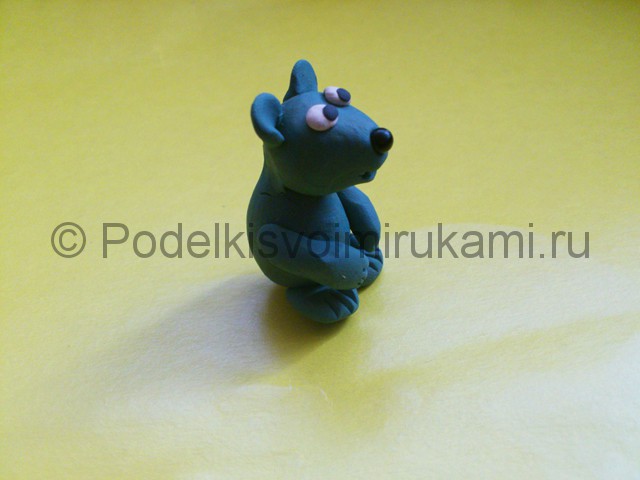
The hind limbs of the animal should be more massive than the forelimbs. Make two identical parts: tubes and wider cakes.
When you understand the limitations of the product, it is easy and very enjoyable to work with. Mice are small rodents that fit into the palm of your hand. However, many people would not like to hold a real mouse in their hands. Pull the mouse out of the clay that you would like to spend focusing on the cute attributes of the animal. Dry dry coating works well for smaller projects and does not require kiln firing. Make sure the clay is soft enough for the craft and add a few drops of water to make the clay more pliable.
Roll out a ball of clay about one-eighth of an inch wide for the mouse's nose. Press the pointed end onto the mouse's head. Unroll two balls about half an inch wide to build two big ear. Press them separately on a smooth surface to form two round shapes. Press the ears on either side of the top of the head about 2 inches from the nose. Roll out four balls of clay about a half-inch wide by four feet. Form the balls into oval shapes. Push your feet to the sides of the mouse. The two front legs go on either side of the front under the ears. Then place the back legs on either side of the mouse about 1 inch from the front legs. Press each foot firmly onto the clay mouse. Roll a snake-like spool of clay to create a tail. Roll the coil about one-quarter inch thick and 3 inches long. Click on it at the bottom of the mouse's body. Draw whiskers on either side of the mouse's nose using a needle tool or knife. Push a needle or knife into the mouse's head to create eyes. Press the eye sockets one-half inch from either side of the nose. Roll two tiny balls of clay and insert them into the eye sockets.
- Create a ball of clay about 3 inches wide to start your mouse.
- He squeezed a handful of clay and threw it into his palms to make a ball.
- Extend one side of the ball to form a head.
- Create a pear shape with a rounded point to represent the nose.
- Press gently onto a smooth surface.
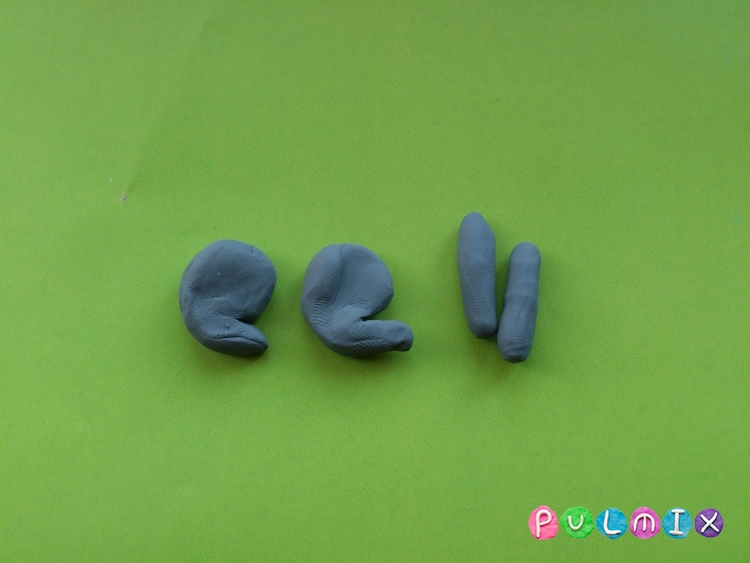
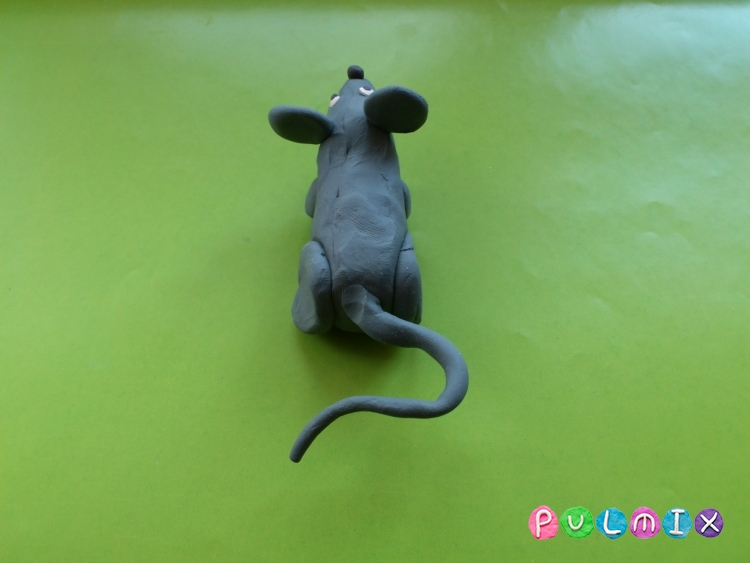
Attach all four parts, placing them symmetrically.
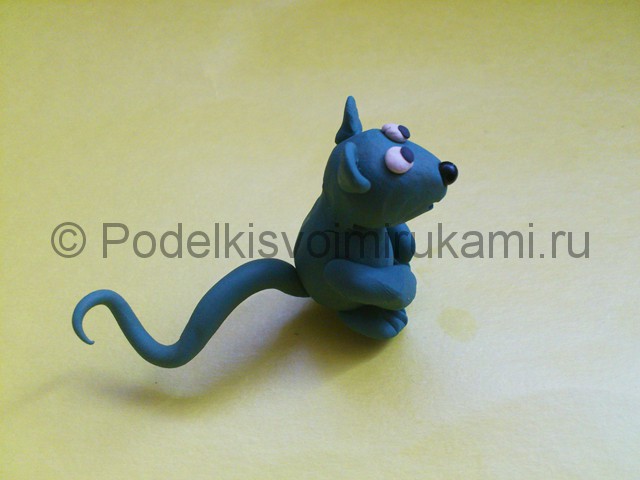
Roll up another piece - a long thin tail from the remains of gray plasticine.
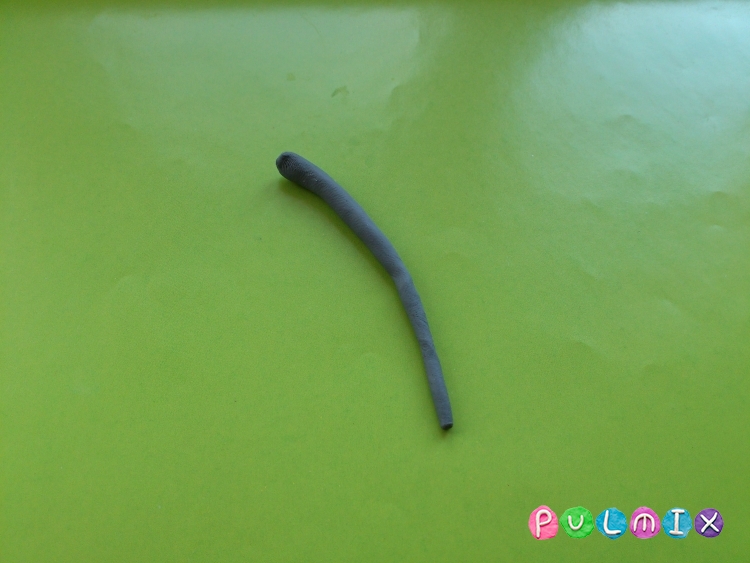
Attach the ponytail at the back.
Here you will find a quick and easy way to make play dough at home for your kids. Once the ingredients are wet and well mixed, start kneading the mixture with your hands until the texture becomes firm and looks like play dough. Check the food coloring package to make unique color combinations, such as yellowish green. Keep play dough in separate, tight containers before and after use to keep the mixture moist and pliable. She is ready for the children to play.
- Mix 2.5 cups flour with 1 cup salt and 1 cup water.
- Add beautiful food.
- Place mixture in an airtight container to prevent drying out.
- Repeat the initial steps, using a different dye for each batch.
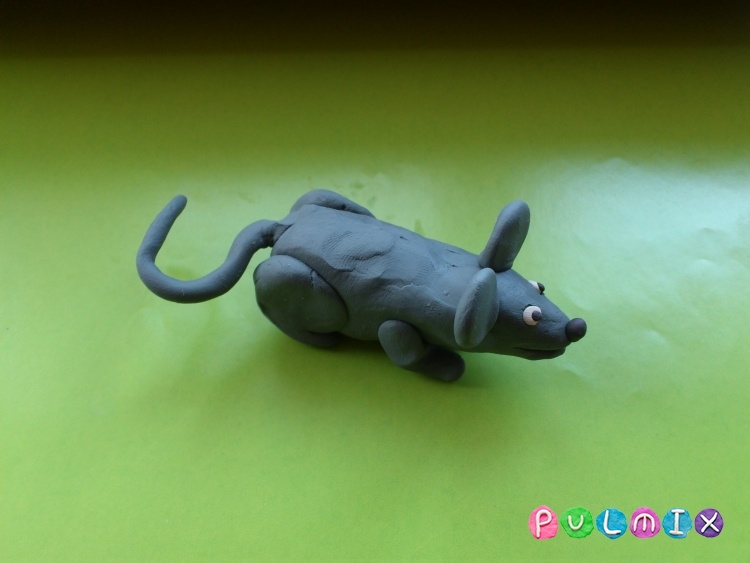
That's all, you can finish your work, cool the craft and admire the fruits of your creativity.
Many people are delighted with bright blocks of plasticine, because you can make any craft from it with your own hands. Children treat this pliable material with special trepidation; they definitely need to be shown some kind of modeling master class; they will be happy to repeat the actions of adults and make their own masterpiece.
It's an unfortunate bug that still makes the rounds social networks since Christmas. In fact, it may be possible to use plexiglass mold to reduce production costs! Recognizes the problem and tries to recover from its error. This toy "ruined" this woman's Christmas.
In mold design, the original model to be reproduced may be an existing figure or the artist's work. To implement the model, various materials such as wood, plastic, gypsum, self-cleaning clay, red clay, white clay, etc. but plasticine is undoubtedly the most suitable material for this purpose, because it offers the most creative freedom and allows the desired shape to be achieved in a short time.
This lesson will allow parents to navigate and help their child with his work. Here is a step-by-step description of the process of sculpting a small mouse from plasticine, illustrated with photographs. After studying this manual in more detail, you will learn how to make a mouse from plasticine with your own hands.
1. Of course, a realistic mouse can be made from gray plasticine; this shade is present in large sets. But if this is not available, invite your child to mix different bars and achieve the desired color. For example, you can combine white, black and a drop of blue material, or replace blue with brown. The simplest option is a mixture of white and black. Any of possible options can be used to create crafts.
As mentioned, replica models can be made from polyester resins, resins, foam and polyurethane resins, epoxy resins, gypsum, fake wood, wax, cement, low alloys, synthetic stone, wood pulp, metal, glass, ceramics, Cardboard, plastic, synthetic and natural rubber, methacrylic resins, natural stone, wood, leather, clay and others. Non-porous surfaces do not require the prior use of release agents, whereas on porous surfaces it is recommended to apply a sealing layer with shellac, nitro paint or paste wax varnishes to prevent silicone rubber from hardening from penetrating through the pores, making subsequent molding operations difficult.
2. From the prepared material, mold the body and head of the mouse in the form of two ovals of different formats.
4. Make eyes from white and black plasticine or from beads of any color. Place the black ball on the tip of your nose and shape your mouth with a spatula. Place round ears on both sides of the crown.
It is very important that the separators are very fluid and applied in a very thin layer so as not to interfere with the accuracy of the parts to be reproduced. Once the evaporating part of the separator has evaporated, it is recommended to apply a thin layer of wax separator.
Once you have the original model to reproduce, the first thing to do is get some moldable silicone rubber for the molds. This rubber consists of two parts: a silicone compound, more catalyst. It is also necessary to have plastic plates and wooden tablets of different sizes.
5. The easiest way to make the upper legs is to sculpt two sausages with fingers at the ends, cut them with a spatula.
6. Attach the legs to the body.
Preparing the first part of the form. On a wooden base formed by plasticine, there is a kind of box of values that can easily contain a reproducible model. We will fill this structure with more clay until it reaches half the height of the box, then we will insert it by pressing our master slightly but firmly into the clay to half its height. polyaddition for the production of calf bivalve, then it will be necessary to use heartless plasticine, which does not create inhibitory catalytic phenomena.
7. Do the lower limbs in the same way and attach them in place.
8. Finish sculpting the mouse long tail from the same gray plasticine.
Or place the template in the same cassette and pour melted wax to cover the bottom half. In this case, it is recommended to wrap the bottom of the model with aluminum film to prevent the wax from adhering. With this system, the mold separation is in a straight line, and with the clay method, a more complex separation plan can be obtained that can closely follow the morphology of the object to be reproduced.
Adjust the plastic or wax surface around the model and form four holes on the four sides of the clay, which will then serve the two halves of the mold online. At this point we will have to decide whether to start preparing the casting channel and escape routes at this stage or wait for the completion of the two silicone molds. In the first case, create a casting channel through which the material is poured into the mold, prepare a type of plasticine imbutin and separate two equal parts.
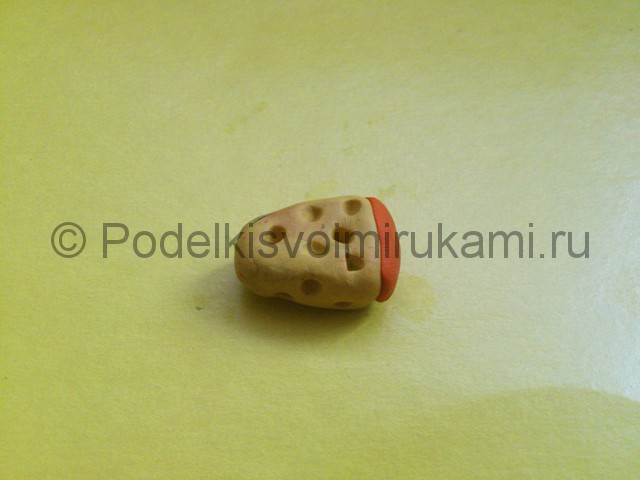
9. From yellow and orange plasticine, mold a triangular piece of cheese to treat your rodent with this delicacy. Make holes in it with a pencil or any other pointed object.
Half of the funnel is attached to the plasticine partition plane, with the thinnest part connected to the model at a given point and flush on the outside, adhering to the edge of the protective box. The second half of the funnel will then be used to complete the channel in the second valve.
It is also necessary to provide an air outlet close to the casting, and for this purpose semi-discarded drinking straw can be used in the clay to connect the model to the edge of the wooden box. Any other ventilation ducts are required at all key points of the model to prevent air bubbles from forming as the material is molded into the mold.
10. Now the child can play with the craft made together with adults.
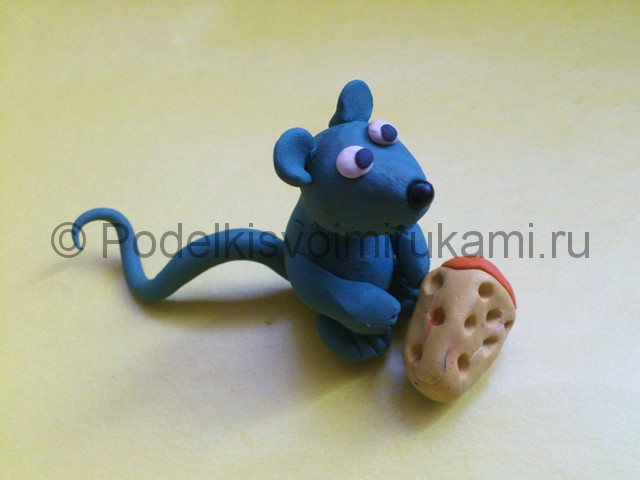
The final look of the craft.
So we have a cute mouse! We hope you and your children enjoyed this modeling master class. Next time you can also try making simple animal figures from plasticine or, for example, a cute pink kitten from plasticine.
Rice. 3 is a basic example of what we will need to do, since we must adapt the work to each item, keeping in mind that there should be only one casting channel, wide enough to allow the filling material to reach every corner before solidification, and the air outlet channels must be large enough to support air bubbles in the grooves to be filled with lead.
At this point the model is ready to build the first press valve, but first we will have to start preparing the silicone rubber. A messenger of life in the cold winter, pine embodies hope. You'll learn how to build a pine baby with a confident look, perfect as a Christmas pendant. You can give the pintette a wide variety of expressions, you can leave it green or add Christmas balls by using small plasticine rims in colors that you like. With his panties and a star on the tip, no one will be indifferent!